
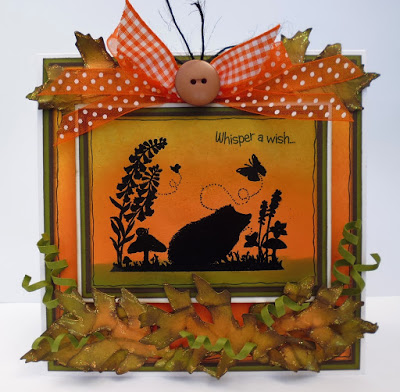
Good morning, everyone - it's Helen N here with this Friday's blog project. My card is a combination of two cards I designed for the recent 'Be the First' class here on Wirral - I'll be showing you some simple masking plus a card shape which is a bit different.
To make the card you will need:
dark brown paper
post-it notes
Promarkers
And this is what you need to do:

1. Let's start with the masking on the stamped image. The great thing about the 'Hot Air Balloon' stamp is that it comes in four separate pieces - three different sized balloons plus the grass/ground. I started by stamping the largest balloon on to a piece of white card measuring 10.5cm by 9cm. I used the Rich Cocoa Memento pad and stamped my balloon on the left hand side of the card about half way down.

2. Next, I stamped the balloon again on to a post-it note - making sure I stamped as close the the sitcky part of the post-it as possible. Cut out the balloon as shown in the photo above.

3. Carefully stick the balloon stamped on the post-it note over the balloon stamped on the card as shown in the photo above.

4. Stamp the balloon again to the right of the first stamped image and above it leaving the post-it mask in place - overlap the two images as shown in the photo above.

5. Peel away the post-it note mask and you will be left with two balloons - one will appear to be behind the other one as shown in the photo above.

6. Add to the scene using the other two balloons - I've stamped one of each size beside the two masked balloons. Colour the balloons using Promarkers.

7. To make the stand for the card, cut a piece of white card measuring 28cm by 4cm. With the longest edges towards you, score lines at 2cm, 4.5cm, 7cm, 21cm, 23.5cm and 26cm. You will be left with a piece in the middle of the strip measuring 14cm by 4cm - on to this piece mat a piece of brown paper measuring 13.5cm by 3.5cm and a piece of patterned paper measuring 13cm by 3cm as shown in the photo above. The stamp the sentiment from the 'Up, Up and Away stamp, trim and mat on to a piece of brown paper. Attach this to the patterned paper as shown in the photo.

8. Concertina fold both ends of the strip of card as shown in the photo above.

9. This photo (above) shows the folds from above.

10. Cut a piece of white card measuring 14cm square. Attach to this a piece of brown paper measuring 13.5cm square and a piece of patterned paper measuring 13cm square. The mat the coloured image panel on to a piece of brown paper measuring 11cm by 9.5cm and stick this near to the top of the patterned paper as shown in the photo above.

11. Next attach the stand to the card securing the end flap on each side of the strip to the back of the card - I've shown one side in the photo above.

12. Finish the card with some Card Candi coloured with the Sandstone Promarker.
Here's another example of this card shape using 'Book Owl':

and another example of masking using the 'Hot Air Balloon' stamp:

I hope you've enjoyed my project today!
Helen N x


Helen, I love this card shape and will definitely have to give it a go. The hot air balloons look fab but I also think the owl card is absolutely gorgeous. Pat x
ReplyDeletegreat card Helen and fab project xx
ReplyDeleteLove the masking and great card shape
ReplyDeleteWOW! Thank you for a fantastic project Helen, a lovely set of cards and great instructions, really easy to follow, looking forward to our next classes in March x
ReplyDeletehow fun!! thanks so much the awesome tutorial!! I have blog candy...I hope you can join in!
ReplyDelete